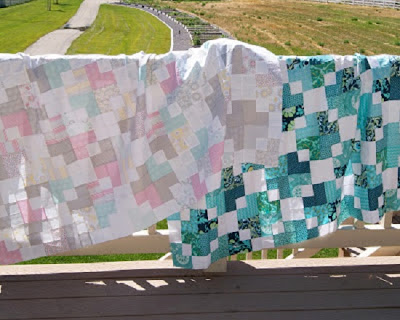
I previously posted that I would be working my way through the book, Simply Retro by Camille Roskelley. I started with the first quilt, Swell. I knew I wanted it to be really scrappy so I pulled down my box of 2 1/2" strips and began cutting them to the right size. I then found some muslin laying around the quilt room and I was off and running. Cutting, sewing, putting the small blocks together to make larger blocks. It was all coming together. I had even posted pictures of a few blocks and some of you commented on the fabric I was questioning. Everything seemed to be going great. That is, until I had all the large blocks together and began moving them around on the design wall. I couldn't figure out how they were supposed to go together to create those little plus sign/crosses. So, I get the book back out and look at the quilt and . . . I put the large blocks together wrong!!!!! Here are some pictures of other peoples Swell quilts that are put together correctly. This how the quilt it is supposed to look.
 |
| Picture borrowed from Daydreams of Quilts Finished by Anita |
 |
| this picture is borrowed from Jana Machado's blog |
 |
| These are from Chocolate Dipped Quilts and are made by a mother and daughter duo |
I really love the pale colors in the quilt above. See how the blocks come together to create those plus sign/crosses? Love them. Okay. I need to make a decision - take the blocks apart and start almost over OR just put it together as is. Hmmm. I decided to put it together as is. I really didn't want to rip out all that stitching (20 blocks) and then sew them back together. Nope, not going to do it. I decided that would take too long and I could make another one later that is correct. I am calling this quilt, Well, Swell. I did it wrong.
After seeing all those other quilts on the blogs, I will definitely be making another quilt using this pattern and I plan on doing it right this time. That pale pear fabric that I questioned earlier, but decided not to replace, really fades out in the picture and is not helped by the pale blue block that is right next to it. It makes it look like there is an empty spot in the quilt. Don't worry, I am not going to change it at this time. That is the completed top in my classroom. I bulldog clip the top to two yard sticks and then hang the yard sticks up on my board. Works great! I am so glad I discovered how to get a picture of my quilts without having other people having to hold them up. Not that I won't have pics of that in the future.

I like your top as well as the other examples. I don't blame you for not wanting to rip it all out.
ReplyDeleteI love the quilt top you ended up with. I would not have taken the time to rip it all out either!
ReplyDelete