Since the 25th was during this week, I also got the new Blogger's Block of the Month pattern and made my two blocks for that quilt. I am really enjoying my process for making these blocks and can't wait until the 25th of May for the next installment. I think we are up to block 8 in that series.
The next thing I worked on was mentioned in one of my recent postings - the Modern 8 Create challenge for April - at least I think it's for April, it could be for May. Taking a picture of something normal around your house and then distorting it or zeroing in on something to make it not what it was. I first took a picture of my modern picture frame.
I focused in on the dots and tried to make them elongate and the more I played with it, the more I didn't really like that idea. So, I took a picture of my hot pink wire shelving.
While that is a fun piece in my office, it would be totally boring for me to replicate as a quilt. Doable, but boring! So, the next item that caught my eye, was the cool flowers on my Puff's tissue box. Hmm, that might be fun. Click.
Interesting. I especially like the laughing pig in the pyramid shelving caught in the edge of that picture, but that is not what I want to work on right now. Okay, let's put this in paint and AHHHGGG - totally frustrating! I can't make it do anything I want it to do. What if I put it in a word document? Yes, that is the trick. Now I can stretch it and squish it and totally distort the picture. Just what I wanted. OOPS. The picture below isn't the finished saved version. It is a blown up version, but not a stretched and distorted one. Let me go on a hunt and find that one. Just a second.
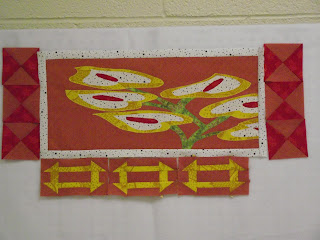
Okay, it won't let me pull it over to here without a major headache so just pretend that I did and below is the quilt I am making based on that picture. I haven't decided on the borders yet, but this is a start. It has been a lot of fun and everyone at Bee was interested in what I was making. Maybe we will have a few more making an art quilt based on an everyday picture. We will just have to wait and see.
I also found this pear pincushion pattern out in blogger land and as soon as I find the place, I will link up so you can make one, also. I thought the pattern was a bit on the slender/small side so I fattened it up some and now, I am not sure - even though this is totally cute, I am not sure if the slender one might have been better. I do know that it would have been harder to sew together on my machine - not impossible - just a little tougher. I might have to make the apple pin cushion (from the same person) using that small 1 1/4" X 3" pattern just to see if I like it. By the way, the original pear was only 1 1/8" X 3 1/2" with dips and curves down to 1/8" at the smallest width. (that is without the seam allowance - not to scare anyone) I might have to sew another one by hand. Oh, one other thing, actually two other things. The stem is a piece of brown strip - about 1" wide and 10" long rolled tightly and then the end tucked back on itself and hand stitched down. Then I took two pieces of fabric and fused them wrong sides together and cut out a leaf shape. I stitched all that to the top by hand. The stem is a little tricky, but I got it to stay on there really well. If you try it and can't figure out how to attach the stem, e-mail me and I will give you my technique.
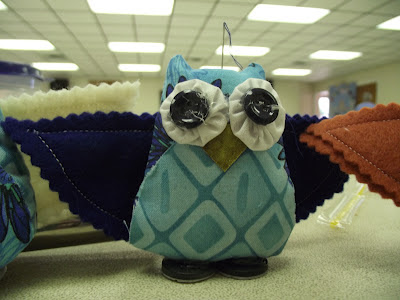
My friend Kathy made these adorable owl pin cushions - one is for her Stocking swap box!! I may have to swipe her pattern and make me a few, also. They are adorable and I don't know if you can see the middle one or not. According to our friend, Gerrie, he has a massive headache.
Thank goodness his headache was all gone by the time he left for home!
.JPG)


