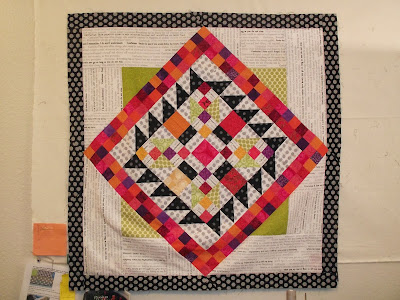
A few months back, my quilt group started a Borders, Borders, Borders project. In this project, each participant makes a block of their choosing and then in the subsequent months a border is added based on the suggestion pulled from a sack. It is similar to a round robin, but the quilt top never leaves the original owner. (we had problems with quilt going missing in a recent round robin so this was our solution to prevent that from happening again) As I wrote in an earlier posting, I had seen this quilt block on Facebook and quickly replicated it the day it was due (can you say speed sewing?) and got it finished in time to show before we left the building that day.
Then it was home to add the first border. It had to be something that used triangles. So, I added semi-large triangles that go all the way around the block in the same black fabric to pull that color out more. (not that black needs any help in this quilt)
The next assignment was squares. I tried several different borders this time and just couldn't get the idea in my head to translate into fabric and onto the quilt top. So, I scrapped that idea and came up with this new one.

This is such a better idea than the original and I love it. Now, this month we drew out rectangles. Hmmm. This top is not that large and knowing that we only have two more border months - we are done in December - unless you want to add more. My go to triangle border is piano keys. But having that luscious border of color, my piano keys would need to be in black and white with maybe some green thrown in. That is doable, but what I really want to do is put it on point and enlarge the entire quilt. So, that is what I have done.
I am really liking this and may have to put some piano keys or bricks around the outside edge to bring back more color, but for now, I can say the black - a similar, but different black fabric - are my rectangles. Looking at this picture, I may have some work to do on that bottom left quadrant. It may have stretched a bit on that bias. That could be the piece that I had to re-do three times to get it to line up the right way. (the black strips are part of that bias corner piece and not added later because the colored squares go into the black about 1/4 inch) This has been so much fun to work on and design along the way. I encourage each one of you to try this yourself. And, if by chance you don't like it you could always gift it away or cut it up and make something else out of it and chalk it up to a learning experience.


I'm liking it. Each round just gets better and better. :)
ReplyDelete