Saturday, December 28, 2013

Finishing up the Jelly Roll Race Quilt

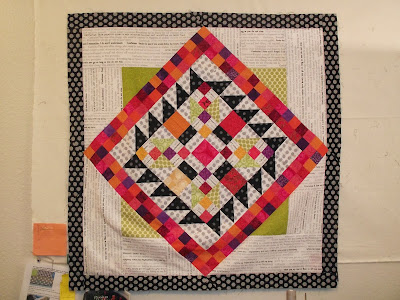
I know, two postings in one day.  Is the world coming to an end?  I wanted to share what I have been working on.  It isn't much, but I have been in the quilt studio at least one day this vacation.  Below is the picture previously posted of my Jelly Roll Race quilt that I made at last years retreat.  I added a couple of borders to it and had planned on adding some flowers, but never got around to that until now.

 
I drew the flowers while at the retreat and even traced them onto stich-witchery stuff, but haven't gotten around to making them until yesterday.   Below you can see what they look like on the quilt.  I can't get a good picture of the entire quilt since I don't have a spot large enough to hang it here by myself.  I even made the back of the quilt.  Bought most of that fabric while in Arkansas this summer.
 
 
I really like how they turned out and can't wait to see this one quilted.  I thought I may give it away, but now, I am not sure.  I might have to keep it and use it for awhile first. 
 
Now it's off to make some more backs so I can get them in the mail and postmarked before the new year.  I have at least 3 ready to go and two or three more with oversized backings that I just need to trim down and package them together.  Easy Peasy.  I has been cool and gray here this morning - lower 40's - but now the clouds have burned off and it is warming up some.  It is turning into a glorious day outside. 

Saturday, December 14, 2013

Retreat Quilt and Weekly Ramblings

Whew!  I have been busy!  Since we got back to school from Thanksgiving we have been cooking up a storm at school and living through a couple of ice storms that have blown through here.  That first week back to school, we cooked for the restaurant and for our open house.  It's a good thing I had a premonition that we wouldn't have school on that Friday and made everyone work really hard and try to get the majority of the items made early.  Well, as it turned out, the ice came in early and I only had one class on Thursday.  The district deemed it not safe for the kids to travel to our building and kept them all on campus the rest of the day.  That meant I had to have restaurant for those that chose to get out and drive in the icy cold all by myself.  My principal said they would come and help me (when she told me I wasn't getting any more kids) but we sent her home early since she lives in Midland so I didn't have any extra helpers.  I ended up serving  it home style where everyone had to come into the kitchen and serve themselves.  Home style worked since everyone that came were mostly friends and "family".   There were a few with reservations that did not show up, a few teachers that had reservations that we sent home early, since they don't live in Odessa and the roads were getting bad and a lot of extra people/teachers that didn't sign up, but didn't want to leave the building for lunch and wanted food.  We had only made enough to serve about 28 since I knew it was a last minute restaurant and I was late in letting anyone know we were even having a restaurant that week.  However, everything went wonderfully and a good friend even helped me wash some of the dishes before she left.   So, it went very well.   I got to go home early (only about an hour earlier than normal) and we didn't have school on Friday - ice, ice and more ice. 

On Monday, we had to scratch a couple of things off the menu for open house due to time constraints and added an easy item that my first year students could easily make.  Then Tuesday was open house, we call it Merry Mingle.  We had lots of great food, drinks and wonderful decorations and even though I took my camera, had my tablet and my phone all there, I didn't get one picture!  I usually take at least one and sometimes have my students walk through and take some just to get their perspective. Unfortunately I didn't do any of that this year.  We had a great turnout.  Lots of our usual  people came by and mingled with us and we had a lot of new people.  Fun was had by all.  It's hard work, but a lot of fun.   We had a bit of leftovers so the kids were really happy and they dug in on Wednesday (after cleaning up a bit).  Thursday we set up for a surprise birthday party for our director.  My kids hung decorations, set up tables, decorated tables and made the punch for the party.  They didn't get to participate, but we did have punch leftover so they were happy.  Now, this next week they have to get down to business and prepare for the final (either on Thursday or Friday)  It has been a fast and furious first semester and we are already having requests for caterings for next semester!!  So, that is looking like it will be another full semester, also.  Which is good.  It keeps everyone on their toes and makes it more fun. 

So, needless to say, I have been really tired when I get home from school, so not much sewing has been going on.  Last night I did put two labels on some quilts and did the binding on a miniature.  That feels good to get those finished.  Now I need to make the binding for about 5 quilts and put them on.  Then labels, and then deliver - finally - to the people that the quilts were made for to begin with.  I need to get moving on that, but yet here I sit typing on the computer.  LOL  I did finish one quilt top that I don't think I posted so I will post that now.  thanks to my students that held it up so I could get a good picture. 


This is the quilt top I worked on over the Thanksgiving holidays and is the example for the retreat quilt I will be teaching in February at our retreat.  It is a simple pattern called Disappearing 4 patch and comes courtesy of Jenny Doan of the Missouri Star Quilt Company.  My mother had seen this pattern in a magazine and suggested it.  I had seen it on-line in a Youtube video from the Missouri Star and since I didn't have any other ideas and it is really simple so my newbies can do it AND since it can be done with charm packs (newbies don't have stashes) I decided that this would be the project.  I made mine a little different from the magazine/video.  I only had a bit of fabric that I was going to use for the background, so what I really needed to do was determine how many 5" squares I could get out of it and leave enough for a float border.  I decided to make 25 blocks (I could get 50 squares from the background fabric) so, I pulled 50 squares of prints from my box of pre-cut 5" squares.  It really comes in handy to have squares and strips already pre-cut when you are making scrappy quilts.  I think I have spoken before about my boxes I have put together full of my own stash pre-cuts.  After putting together my blocks and a float border I decided it need a really wide border (8 1/2") for some fun. Turns out, mine is 60" square while the original is only 52" X 60" with only a float border.  Hmmm. Not bad and I really like the red border.  I ordered some charm packs to make the original and will make up a few blocks from them and leave a few in progress so I can use them in the demonstration while teaching this quilt, but I really think I will order some yardage of that print fabric so I can put a border on it if I want.  Or I could order another set of charm packs (print/background) and make it much larger.  Hmmm.  Something to think about. 

I guess I should get going on something and quit typing around and playing games on here.  I plan on trying out a new recipe and need to make my cookies for our cookie exchange on Tuesday (might put it off and make them Monday night), but in order to do all of that I have to go to the grocery store.  I missed my usual time of 8:00 this morning.  I was up, but I was too busy snuggling with my dogs.    I don't really like to go when it is so busy, even though I see my friends there, so I am not sure if I will get out now and go.  However, this cake recipe (crème of coconut cake) that I got off the internet is calling my name.  I like to zoom in, zoom around the store and zoom out.  Not have to dodge carts that are being driven by children who don't have their cart licenses yet, by people that are texting and driving and by bored husbands that don't pay attention to where they are or think that we are all playing bumper carts.  Ugh I may have just talked myself into waiting until the morning to go shopping.  I think I will have some lunch and think about whether or not I want to bundle up and head out or take a nap and snuggle some more with my dogs. 

Saturday, November 30, 2013

Wonky House Block

For the next Bee Balm block, Janet requested wonky houses.  I knew I needed to get on this sometime this week and since I can't decide on a border for the retreat quilt, I set to making my house.  I pulled scraps from the tub and got to work. 


I wanted the turquoise fabric for my background, but could only find it pieced together with the darker blue fabric either in half square triangles or in a 4 patch so when all the dark blue got cut off the left side of the block it made an appearance on the right side.  So, I say the sun is setting and darkness is creeping in from the west. 
 
I really like Janet's idea of a wonky house quilt.  I can't wait to see what she does with all her blocks.  

Tuesday, November 26, 2013

The Wal-Mart Experience

I went to Wal-Mart earlier today and to tell you the truth it wasn't as bad as I thought it would be.   Everyone I encounter was nice and friendly.  People were waiting patiently for others to move over or finish finding the exact item they need.  It was really a pleasant experience.  My basket is full - not Thanksgiving food - shocker, but I am not cooking - just stuff I needed or else I wouldn't have gone in the first place.  I find the only regular line down by the doors I came in and am the 6th person./basket in line. I know that this is going to take forever since most of those baskets are filled to the brim, but I have more than 20 items so I grab a couple of magazines off the shelf and begin reading through them.  The lane next to us is a 20 item lane and one of the people in front bails out and goes over to that one since it is down to it's last person.  Then a nice lady gets in line behind her and she and I chat a bit about shopping so close to Thanksgiving.  She is only there to pick up items for that one dish she has been committed to bring.  Apparently she was told at the last minute and didn't have the ingredients on hand.  Meanwhile I am still in the same spot - actually I have moved almost 3 feet forward and am trying so hard not to bump into the guy and his wife in front of me.  He is making it hard not to do that, but in the end (pun intended) I succeeded and never once bumped or brushed or ran over his heels.  Yea, me!

Now, for the unpleasant part of the day.  While I am standing there - yes, still in my 3 foot area - a new basket pulls into the 20 or less line.  It is pushed by a dad in shorts and t-shirt (hello, it's 40 degrees outside) a pregnant mom in fleece Tweety bird pajama bottoms, striped short sweater and a hoodie jacket - none of the colors worked together, a boy of about 8 or 9 that is on the other side of the basket and doesn't come into the story and a little boy between 2 and 3 that is bouncing a ball between our baskets.  Both boys also have on what appears to be pajamas.  (Hello again - it's 1:30 in the afternoon and you are out in public!  I had to add that last bit about being out in public, because I never got out of my flannel pajamas on Sunday, but I wasn't going anywhere with all that ice on the roads.  I was staying at home.)  Back to my telling of the events.  This little boy is crowding the man in front of me, he keeps losing his ball and it rolls into the mans foot.  The man keeps looking back at the boy and then at me - hey, mister, he isn't mine - and moves forward a bit more - yea! 4 feet - Now, this little boy sees something in my cart that he wants and reaches for it.  I put on my teacher face and tell him "no" and shake my head.  He takes his hand off my cart, but keeps coming over to it and getting on the floor.  At one point I thought I was going to have to run over him to get him to move out of the way.  I considered asking very loudly, "Whose child is this?" just to see if the parents pay attention, because they haven't since they got into the line.  Mom's phone rings and she steps away, Dad - who knows where he went - and their basket is just sitting there.  The clerk is leaning over her counter trying to get some one's attention because they were next.   Thank goodness the little boy wasn't screaming or yelling or being really rowdy - just playing with his ball under the carts, but this non-parenting has got to stop in America.  They are your children and you need to pay attention to them and keep them in line.  Preferably your line. 

Thank you to the new clerk on my right that told me to come over to her lane she was just opening up.  I got away from the boy, his ball and his non-existent parents and I got out of there before the couple in front of me even began checking out. (I was nice and offered to let them go over to the other lane, but they didn't understand what I was saying - not a language barrier problem, just a man and woman that weren't with it) I was grateful to get out of Wal-Mart in a fairly good mood. 

Monday, November 25, 2013

Icy Weather, New Project and Irish

WoooHoooo!!  It's warming up outside.  We went from 79/81 degrees to the bottom dropping out and a high of 29 within just a few hours (less than 12!) and have not gotten over the freezing mark since Friday.  It is a balmy 33 degrees right now and warming up, but I still don't want to go out.  Not because it's cold.  Not because the roads may not be clear, but because all the ice that is falling from the trees and power lines.  It sounds like my house, yard and alley are getting bombed by ice!  I looked out the back window awhile ago and - OOOH big bomb just hit  - that was a huge one - anyway, I looked out the window and watched the ice fall off the power lines in huge chunks.  (about 2 inches around and 20 inches long)  That last one fell from the tree next door and hit something.  It was loud.  Those chunks are a lot larger.  They are about 3 inches in diameter and 6 inches long.  Huge chunks!  That last one may have hit the garbage can outside because it sounded like someone throwing away a large bag of trash into an empty container.  BAM!  For those of you that don't live in the Midland/Odessa area - or anywhere in west Texas, it has been cold and icy this past weekend.  We had a major storm hit the area and have been covered in ice for the last 3 days.  Since this area has some of the worst drivers on good weather days, I try to stay inside on bad weather days, because those same drivers become complete idiots.  If driving 55 in a 40 and weaving in and out of traffic is okay on good days, then driving 70 in a 40 with icy conditions is even better!  (they are still trying to weave)  Oh, yes, and let's all try to pass each other on the overpasses because we all know that those don't freeze over!  Within a 30 minute time period Friday morning, 3 overpasses in Midland had major wrecks on them and they had to shut down the loop.  Come on people!  Overpasses are the first things to freeze and ice over.  See what I mean?  Idiots live and drive among us! 

Okay, enough ranting for now.   It's time to actually get dressed in real clothes - not loungy pajama clothes - and get some work done.  No more snuggling on the couch and watching television or playing games on the computer.  I have to come up with a project to teach at my retreat in February.  My mom suggested doing a quilt like this so I made a couple of blocks. 


I like it, it's simple, but I am not completely sold on it.  I will need to cut some more background blocks and find my 5" squares tub (I know where it is - in the garage - I just don't want to walk outside to get it, yet)  I will continue to work on this idea along with several others I have over this week (can you cheer for having the entire Thanksgiving week off from school? YEA)  and see if I can put something together that is easy enough for the newbies and that might have enough of a challenge for the seasoned quilter.  Just haven't hit on the right project yet.  (even though, seeing this picture it's kind of growing on me)

On a sad note, Irish, my oldest Shi Tzu, passed away on Saturday.  He was 15 years old and lived a good and pampered life. He was the best little traveler.  When he was little, we drove to Dallas about 6 times a year to visit my mom and he would get in the car, look out the window - had to keep the baby locks on or he would roll down the window and then sleep most of the way.   My vet called him the miracle dog because he had a stick go through his eye - thank goodness for a fantastic doctor out at the pet emergency hospital, you couldn't even tell which eye - he had testicular cancer at age 5 and had to be neutered,  he was attacked by a pit bull - thank goodness for having a ponytail that everyone made fun of - it saved his life - left a few teeth holes in his head, but he never bled - had a tumor come to the surface of his neck and rupture in April and survived the surgery to bounce back to running around the house - well as well as a blind, deaf 14 year old could run - but he did run around a bit.  Yep, I would say he  definitely was my miracle dog.  He is the one on the left in both of the photos below.   He will definitely be missed.


Thursday, November 14, 2013

Borders, Borders, Borders Update

A few months back, my quilt group started a Borders, Borders, Borders project.  In this project, each participant makes a block of their choosing and then in the subsequent months a border is added based on the suggestion pulled from a sack.  It is similar to a round robin, but the quilt top never leaves the original owner.  (we had problems with quilt going missing in a recent round robin so this was our solution to prevent that from happening again)  As I wrote in an earlier posting,  I had seen this quilt block on Facebook and quickly replicated it the day it was due (can you say speed sewing?)  and got it finished in time to show before we left the building that day.  
 
 
Then it was home to add the first border.  It had to be something that used triangles.  So, I added semi-large triangles that go all the way around the block in the same black fabric to pull that color out more.  (not that black needs any help in this quilt)


The next assignment was squares.  I tried several different borders this time and just couldn't get the idea in my head to translate into fabric and onto the quilt top.  So, I scrapped that idea and came up with this new one.   


This is such a better idea than the original and I love it.  Now, this month we drew out rectangles.  Hmmm.  This top is not that large and knowing that we only have two more border months - we are done in December - unless you want to add more.  My go to triangle border is piano keys.  But having that luscious border of color, my piano keys would need to be in black and white with maybe some green thrown in.  That is doable, but what I really want to do is put it on point and enlarge the entire quilt.  So, that is what I have done. 
 
 
I am really liking this and may have to put some piano keys or bricks around the outside edge to bring back more color, but for now, I can say the black - a similar, but different black fabric - are my rectangles.  Looking at this picture, I may have some work to do on that bottom left quadrant.  It may have stretched a bit on that bias.   That could be the piece that I had to re-do three times to get it to line up the right way.  (the black strips are part of that bias corner piece and not added later because the colored squares go into the black about 1/4 inch)   This has been so much fun to work on and design along the way.  I encourage each one of you to try this yourself.  And, if by chance you don't like it you could always gift it away or cut it up and make something else out of it and chalk it up to a learning experience.  

Sunday, November 3, 2013

Savings Time Woes

Ahh, Daylight savings time.  I love having an extra hour of sleep.  I love having an extra hour to put off posting my grades in the computer. LOL (and using this posting to put it off even more)   I love that it happens in the fall when it is cool outside and I can snuggle under the covers for that extra hour.  Okay, not a complete hour since my dogs didn't get the fall back one hour memo. They have a built in clock and "know" when it's time for me to be up and "know" when it's time to eat.  HOWEVER. it is going to be a tough time re-teaching them when dinner time is now that we have turned back the clock.  We go through this every year!  Why is it they can't re-set their internal clocks?  They do a great job of it in the spring.  We don't have any problems in the spring, they turn their clock forward one hour, but the fall?  Nope, they don't do anything then.  So, for the next few weeks, it's going to be early "bark-up" calls to get me out of bed and it's going to be early barking and pouncing on top of me and licking me in the face and barking and more barking until I give in and get them some food at dinner time.  I am going to have to work them gently and slowly back to the correct dinner time 15 - 20 minutes a day.  Okay,  I guess it's time to give it up and post my grades and quit griping about daylight savings time.  Why can't we just cut it in half and fall back only 30 minutes and call it quits?  Sounds good to me. 

Saturday, November 2, 2013

Exchange Blocks and Challenges

I have got to stop making these blocks and wait patiently for my Bee Balm group to send me more blocks!  The one in the bottom middle was made by Elaine.  She was "Johnny-on-the-spot" and made her block for me almost immediately after I posted the directions.  I can't wait to see what everyone else makes.  This is fun.  I now need to post this over on the Bee Balm site.  As soon as I do, I will link it in so you can see what else we have been up to. Edit:  there is a new block posted over there.  Turquoise and orange! That will fit right in with these other ones. 


Another project from a Blog is this next picture, my miniature "Amish" quilt block using made fabric from a challenge by Victoria over on 15 minute play.  I will be posting there soon, also. * Just did.  This was a fast, fun and relatively easy quilt to make.  I just pieced together some scraps from a couple of other recently completed projects and some fabric given to me at a recent retreat and the center and bars are done.  The border was a bit of a challenge in that I wanted an orange, so it couldn't totally overpower the quilt, but instead had to let the made fabric and bars shine.  I thinks this is the perfect combination of fabrics from the middle to the borders.  It all just came together this week.  It was a great challenge and now I need to quilt, bind and label this tomorrow.  

 
I have a bit of an obsession with orange these days.  I have always enjoyed the color orange and enjoy having it on the side - not the main fabric - in a quilt.  It just adds that little bit of spark that some quilts need and takes it over the top.  However, this little quilt has embraced and adopted the color orange and is bathing in it's glory.  What began as small pieces of orange to zing up the pink and black and whites of the made fabric, has totally taken over the entire quilt top with it's orange-ness.  I may have to give this a Halloween name - not for the orange and black, though that contributes to the reasoning - I finished putting the top together last night - Halloween.  

Monday, October 21, 2013

Borders and Geese

I was talking to my mother on the phone the other day and I asked her what she thought about the new border I added to my Borders, Borders, Borders project.  She had no idea what I was talking about and asked if I had just recently posted it, because she had not seen it.  That got me to thinking . . . had I posted it?  Was I just imagining that I had written a post about it?  Had I even taken a picture of it?  Hmmm.  So, immediately after hanging up with her, I got on-line and looked and nope, I hadn't posted anything about my block.  So, had I taken a picture?  I couldn't have.  The camera had been in the car for about a week or more and I had just brought it in the day before and it was still downstairs.  Life has been so crazy busy for me since school started that there are some weeks I just operate in a day to day mode.  Do you ever have a life like that?  I was just working from one deadline date to the next. 
 
After school one day, I had a teacher ask me to do something 4 weeks in advance and I told him I couldn't even think about it or discuss it with him until I had made it through the next two weekends.  At the time, I just knew if I had one more item added to my plate, everything would crumble and fall and I would go bonkers.  I can usually multi-task pretty well, I think most of us can, but how many things can you juggle at one time?  That is the million dollar question.  When he asked me to do that one thing, I was juggling about 11 different things and I just knew, that twelfth item would tip the balance for me.  I knew if I could put him off for a week or two, things would come together, I would finish up two huge weekends of quilt show and quilt retreat and then I would only be juggling 3 or 4 items.  Then, and only then, could I sit down and discuss with him what he needed me to do. Luckily he kind of understood and was patient with me and waited until I had time.  Well, life hasn't slowed down much at all, I have had to totally get one item off my plate - I wasn't enjoying doing it so that was a fairly easy decision - and two more things are coming to an end this week so I am looking forward to some peaceful easy living in my future.  (Who am I kidding?  I teach High School.  There is always something else coming around the corner to be put in the air and juggled)
 
Anyway, that is a long and rambling road to get to my picture of my Borders project.  This months assignment was to add a border using "squares".  I had planned on putting squares on point and doing a border all around with those.  After making and vetoing that, I decided to put large 4 inch squares around the border.  I cut out my squares and put them on the design wall and . . . nope.  It didn't look right.  I didn't have time for this nonsense of making a border and then not wanting to use it, so I left it right there and knew I would get back to it - left it spinning up in the air.  I knew I wanted to bring in more color, I didn't want to add anymore black or gray or white, but I wasn't sure how I was going to do that yet.  Sometimes you just have to sleep on it (and sleep on it and sleep on it) until the right solution pops in your brain.  That's what happened with this one.  A nice scrappy 4 patch border in just the warm colors from the middle block except for the yellow.  I didn't want to put any yellow in this border.  I wanted a really warm border to contrast the cold and shocking border with the black and gray/white half squares I added last month.  I will put some more yellow in the quilt, because it needs more yellow, I just didn't want any here.  I know some of those squares look golden from this picture, but they are really an orange print.    


I am liking the look so far and know that if I want a larger quilt, I am going to have to make the next couple of borders larger or even put this on point this next month.  I will have to wait until Saturday to find out what our next border must have in it.  The block that is in the lower left corner of this picture is the other quilt I am working on in the Borders challenge and it still needs a border with squares, but I can't find the fabrics for that block.  I have them somewhere, but they are not where I thought I put them.  Therefore, this one isn't ready to be shown this week at our meeting. Or here on the blog.  That's okay, I am an over achiever anyway - according to the group - doing two quilts.  It is all because I started with the one in the lower left corner and had planned on using it for my project, but ran out of background fabric so I made the other one.  Since we started, I have found another fat quarter in my stash of the background fabric, pulled it all out and put it together somewhere safe.  I just have to find where that safe place might be so I can work on this quilt.  juggle, juggle, juggle.  The good thing is, I had already put a border with triangles on it when I started it so I will only be one month behind instead of two.  sigh. 
 
Okay, this is the next thing I wanted to show.  If you read my previous posting, you know I am in a block exchange group.  November is my month and I chose the Goose in the Pond block.  I made one block to show in a tutorial and yesterday while watching football I made two more (You are asking - is that all?  two blocks all day?  I also took a nap, did a couple loads of laundry, played with the dogs -my day wasn't all about making those two blocks).  I almost have two more made tonight, but I still need to square up all the half square triangles, but I can do that tomorrow night during the Voice.  I have set the blocks I have made on point to see what they would look like and then in a row.  I can't wait to start getting some of these from the ladies to put on my design wall and play with.  I may want to sash them with colored cornerstones.  Stay tuned and see how this one evolves.  Oh, yes, for those of you who are wondering, my mother lives about 11 hours away from me in a totally different state and she sees what I am making only if I post it on my blog or when we find the time to Skype.  (I know, some of you are thinking, 11 hours, of course you are going to be in a different state, but I can drive 11 hours from here and still be in Texas.  Actually I can drive more than 11 hours and still be in Texas.  It's huge ya'll!!) 


Sunday, October 20, 2013

Goose in the Pond Tutorial

This is a tutorial for my November block for the Bee Balm group.  I would like for you to make a Goose in the Pond block using the following fabric selections.   For the background I would like a white with black print fabric.  The outside half square triangles can be any color from the cool side of the color wheel.  (blue, green, purple, teal, blue violet, etc.)  The inside 9 patch and strips are any color from the warm side of the color wheel (yellow, orange, red, pink, etc.) 


From the white/black print background fabric - cut: 
6 - 4" squares;
5 - 3 1/2" squares
1 - 1 1/2" X 20 1/2" strip
2 - 1 1/2" X 12 1/2" strips

From the Cool fabric - cut:
6 - 4" squares

From the Warm fabric - cut:
2 - 1 1/2" X 20 1/2" strips
1 - 1 1/2" X 12 1/2" strip

 
As you can see from the picture above, I chose red for my Warm color and Blue for my cool color to use for this tutorial.  Also, the strips are folded in half so I could fit them all into the picture.  It is so handy to have my boxes of pre-cut strips and squares.  All I had to do was find enough squares of the same fabric for my Cool and then two strips from my 1 1/2" box for my Warm.  I am going to dig through again tomorrow to make another block.  Okay, carry on - sorry I got side tracked. 
 

Now that everything is cut, you are ready to sew.   Either draw a diagonal line or fold and press a diagonal line on all 6 of your background 4" squares.  Place one background square right sides together with a Cool fabric 4" square.  Sew 1/4" on both sides of the diagonal line.   Repeat  with the other 5 squares.  In the picture below, you can see my pressed line and I am sewing 1/4" from that line.


It's a little hard to see, but I have sewn two lines of stitching on either side of that pressed diagonal line.  I turned it over to the blue so it might be easier to see the stitched lines from this side.  Cut on the diagonal line.  Press toward the Cool fabric.


Square up each square to 3 1/2" and set aside. 


Sew one Warm 20 1/2" strip to a background strip of the same size.  Press toward the Warm fabric.  Sew the second Warm strip to the other side of the background strip.  Pressing once again toward the Warm fabric.  You now have a WBW strip.   (sorry - no picture of this)

Cut this WBW strip into 4 - 3 1/2" squares and 4 - 1 1/2" pieces.

Sew one 12 1/2" Background strip to a Warm strip of the same size.  Press toward the Warm strip.  Sew the second Background strip to the other side of the Warm strip.  Pressing once again toward the Warm fabric.  You now have a BWB strip.  (again, no picture)

Cut this BWB strip into 8 - 1 1/2" pieces.

Create 4 - 9 patches sewing two of the BWB on either side of a WBW piece.  Press toward the middle. (finally a picture of the finished 9 patch block and a partial of the WBW strip block)


 Sew one 9 patch block to one strip block lining them up as in the picture above.  Sew the second 9 patch block to the other end of the strip block.  Repeat for one more set.  Now sew the remaining strip blocks to a 3 1/2" background block with the warm fabric to the block.  (see the picture below)


Press the top and bottom strip toward the outside and press the middle strip to the middle and you will be able to butt up those seams when you sew the entire group together like the picture below. 
 
 
You now have your center of the block finished and are ready to add the outside borders. 


To create those borders, you need to sew a 1/2 square triangle to either side of a 3 1/2" background square.  Make sure your triangles are turned opposite of each other as in the picture above.  Go ahead and sew all 4 of the remaining 3 1/2" squares exactly like this.   Attach two to either side of your center block.  


Add one 1/2 square triangle block to either end of your leftover strips making sure the triangles face the same way as the one next to it.  (I don't have a picture here for you to see, but you can refer to the original drawing at the beginning of this tutorial or the picture below of the finished block.   Attach the borders to the top and bottom of your block matching seams. 
 
 
Be sure you pay attention to your block and the direction of those triangles or you will end up with a block like the one below.  I had to "un-sew" and then put it back together to get that beautiful block above.  Just wanted to show you that I do make mistakes.  However,  I don't always take pictures of them and then post them on here.  I thought you might get a kick out of this one, though. 
 
 
Enjoy making this block and I can't wait to see what all color combinations you come up with.  I hope this tutorial is helpful and doesn't totally confuse you.  If you need help or clarification feel free to send me an e-mail. 


Thursday, October 17, 2013

Nutty Pumpkin Muffins

It has been a while since I posted anything on here.  I truly think about you often, but just haven't made the time to take pictures and sit at the computer to post anything.  Since I am at school, avoiding grading, and I have demonstrated making Nutty Pumpkin Muffins in all  of my classes today, I will share with you the very best pumpkin muffin recipe I have ever EVER tasted.  It is my favorite muffin of all time and now that the weather is cooling off - it's the perfect time to pull out this recipe and devour these muffins.  (FYI: they freeze well, if you have any leftover - I have never frozen any in the muffin form, but I have made mini loaves using this recipe and have frozen those)
 
Nutty Pumpkin Muffins
 
4 eggs
3 c. sugar
2 c. canned pumpkin
1 c. vegetable oil
2/3 c. water
3 1/3 c. flour
2 t. cinnamon
2 t. baking soda
1 t. baking powder
1 t. salt
1 ½ c. pecans, chopped
 
Mix all the wet ingredients in a bowl.  Mix all the dry ingredients in a separate bowl.  Make a well in the dry ingredients and add the wet ingredients to the dry.  Mix until the flour is just incorporated.  Fill sprayed muffin tin cups 2/3 full of batter.   
Bake at 350 for 20 – 25 minutes (I pulled mine today at 19 or 20 minutes and they were perfect)

 Yield:  24 muffins (I made 30 in each of my classes today, filling the cups 2/3 full)
 
I can't figure out why the font is goofing around.  I tried to set it all at one font and one size and then it does what it wants.  Weird and it's not even Halloween yet. 
 
I hope you enjoy these muffins as much as I do.  They truly are delicious and even my students that don't like pumpkin or nut stuff gobble these right up. 

Sunday, October 6, 2013

Rambling about the Weekends

I vended at the Midland Quilt Show this weekend and I am TIRED!!  I went to bed early last night and have slept most of the day today.  Part of it is due to my allergies.  They are bad and have been bad since last weekend when I went to the Ogallala Ceta Canyon retreat.  Something up there in Happy/Canyon triggered my allergies and I haven't been back to normal since.  It could also have been the carpet in both places - retreat and vending area.  Neither one were exactly clean.  This weekends carpet was filthy!!!  I have taken another round of allergy medicine and am hoping I don't have to do a third round before I go to bed.  I just hope I have enough tissue around to keep me from having to use my sleeve. LOL 

I am in the process of unloading my car from this weekend's fun.  I took out all the stuff that I store in the garage - tables, boxes, etc. when I got home last night and have put off taking out all the fabric bolts until now.  I have hauled up 4 loads of bolts into the office where I keep them and have at least 4 more loads - probably 6 loads - to go.  I am taking a "sweat" break - sitting in front of the fan and typing on the computer waiting to cool down some before going back down the stairs to get a couple more loads.  WHEW!  It's hard and tiring work, but I need to do it so I can fill my car tomorrow with groceries. 

Both weekends have been wonderful and productive weekends and have been a lot of fun re-uniting with old friends and seeing what wonderful quilting work everyone has been up to in the past year or so.  These women are super talented and inspiring. 

I really enjoyed vending near the Lovington ladies and getting to know them.  I always love what they bring to Ogallala and after going to the store this summer on our shop hop, I can't wait to take a class there sometime soon.  I am hoping my friend,  who moved to Lovington this summer and shall remain nameless at this time, and I can get together at the store and enjoy a wonderful class and time to be together quilting.  I know she has always wanted to quilt and what better way to get her involved than to make her take a class with me.  I probably should have said encourage her to take a class, but I will more than likely have to make her take the first one so I will leave it that way for now. 

Okay, it's time to head back down for a couple more loads. 

Sunday, September 22, 2013

New Machine Cover

I am soooo excited.  I have almost finished - just needs a little hand work - a cover for my sewing machine.   Saturday afternoon, (a week ago) after returning home from my monthly quilting day with my Bee Friend Group,  I decided that I needed a new cover for my machine.   I have never made a machine cover before, but I have the original one that came with my machine and I can copy that one. What would be so hard about that?  I measured the various parts of the old cover and wrote those down on a sheet of paper because I might want to make more than one and I might need to make some tweaks to the pattern.  I needed the usual:  front, back, sides, but then I would also need a front pocket for the table, a back pocket for the foot pedal and cords (machine and extensions) a couple of tabs for the opening for the handle.  Plus, the sides come up over the top and lap over the handle tabs.  I can do this!   I also thought it would need to be sturdy so I might need to add some canvas to give it that stability.  Not a problem.  I just finished a bag that I had added some canvas to and I had some left over. Let's get this started. 

Looking up at my design wall I made the decision to use some made fabric that I had planned on using to make a pillow for my couch for the cover.  I took that down, used some iron on fleece/batting and quilted that piece.  I cut it into parts and realized I was going to need a whole lot more fabric if I was going to make the entire cover from made fabric.  So, I got to sewing and sewing and sewing.  I would get a piece that I thought would be large enough quilt it, cut out a part and then  I would realize I needed a bunch more.  It takes a lot of made fabric to make this cover.  I used leftover binding to cover the edges on the handle tabs, top of the side pieces that lap over, the top of the pocket, the top and side edges of the table pocket.  Thank goodness I have kept various pieces of binding.  Not knowing what I would be doing with them other than maybe sewing them together to create a scrappy binding someday.  I now have several different bindings on this cover.  Like I said before, I am sooo excited!!!  Here is a look at my new sewing machine cover. 

Okay, just a sec.  I have to figure out how to get back to where the pictures are stored.  This is so frustrating to have to re-figure this out every time now. Hang on I am going to leave you for just a sec.
 
Finally. I had to go back and download it straight from the camera to here.  Never done that before.  I don't know what I did to make my computer not download it the way it used to.  Oh, well.  I got it done.  This front picture shows the table pocket with it's two different bindings - the top (blue) to attach it to the front piece and the red/pink/green binding that is the opening to slide the table into.  I need to find some Velcro and attach it so it won't slide out when I carry the machine.  I don't have any other angles of the cover yet.   It is totally lined - which is why I still need to do handwork to attach the lining to the top section and tab - both pockets are lined, also. It makes me smile when I look at this picture.  This is what I have been working on all week during the one to three hours a night that I have had this week.  I knew I wouldn't have much time this next week and I really, really wanted it finished before Friday and it is!! 
 
Now to finish up another project I started a couple of weeks ago.  It was a pattern I received during a shop hop or opening or something I went to this summer.  I almost gave the pattern away since the quilt picture on the front of the pattern doesn't do anything for me, but there was something about the pattern  that kept calling my name.  I finally pulled some 1 1/2" strips out of the box and sewed them into 9 patches, found some brown fabric for some setting corners and started sewing. I needed some more setting blocks, but I didn't have anymore of that one brown fabric.  I finally found something similar and put together the rows.  What to do for sashing? I auditioned some greens, another brown that was striped and then I saw a fat quarter in pink with a little green and yellow that had some birds on it.  Love the colors in this fabric.  After cutting it up, you can't see the birds, which I like.  This is the perfect sashing and first border fabric.  Now, to find the perfect next two borders.  I did realize after putting the sashing and borders that I should have gone back and trimmed my rows a bit to make the squares points perfectly meet the sashing, but oh, well.  It still looks great to me.  

 
I also need to add the next border round on these two quilts - our assignment is squares. 
 
 
I think I had previously stated that I didn't know what I was going to do with the top block since I didn't have any more of the background fabric, but I have since found another fat quarter of that fabric so, we will see how far I can make that fabric stretch.  On the bottom one, I am thinking it needs more color so I am not going to use the background fabric (well, that is the plan) on this next border and do it in the colors in the middle section.  (can you find the problem with the first block?  I may leave it or take it apart and fix it.  Can't decide what I want to do, but will make the decision before adding the next border)


Friday, September 13, 2013

Low and Behold!!!

I haven't been to Abby's site in well over a week so I had to scroll through several postings to see what was going on in her life.  Low and Behold!!!  My quilts are on her blog!!!  You can see the most recent quilts she quilted for me here.  I was so excited to see them and they are great pictures.  Much better than I could take here at home.  Now I am going to scroll through her blog to see if she posted my previous quilts.  I hadn't seen them on there so I am not sure if she posted them or not, but I am going scrolling! 

Wednesday, September 11, 2013

Estate Sale Finds

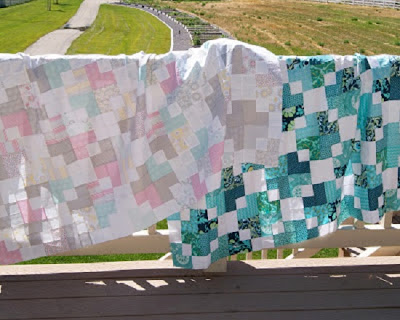
Below are two quilt tops I found and purchased at an estate sale this past weekend.  I am going to take them to my quilt meeting on Saturday to see if anyone can tell me anything about the fabric in them.  I do know there is a variety of fabrics from a silky one, a knit one and some just plain cotton.  It looks like the 30's to me and I think there might be some flour sack fabrics, but I am not entirely sure about that.  We will see what my group has to say about them.  They are sewn by machine - there was a machine for sale, also, but I didn't purchase it - only these two tops and a stool (actually a chair seat without the back.  I have another one similar and I plan on painting these two)   Just wanted to share with you some things since I haven't taken pictures of what I am working on at home.  Maybe tonight will be the night I take my camera into the studio.   I took these at school with my new phone and sent them to my e-mail and posted them on Facebook.  That was a first for me!  I am learning how to use my new phone more and more each day. 


Friday, September 6, 2013

Blocks for Bee Balm Group

 
My camera and my computer are having a major fight.  They are no longer speaking to each other!  It is so frustrating.  I may have to hire a mediator to get them back together.   It has taken me hours to try and figure out how to download the last 4 or 5 pictures of quilts and blocks from the camera to the correct file to be able to use it here on my blog.  I wanted to quickly share these finished blocks before I put them in the mail on Monday (today if I can find time to make it to the post office between school and volleyball) These are the latest blocks from a quilt group called Bee Balm.  There are 12 women in this group and we each have a month.  When it is your time, you are to tell the group what block you would like made and the group makes and sends you those blocks.   Most of the time, the recipient has sent some or most of the fabric for the blocks and you just need to add a bit to make it more unique.  So far, we have done blocks for February through August which these are for August.  This group is about half from the U. S.(Texas, Louisiana, Colorado, Maryland, Kentucky, Mississippi) and half that are international (Canada, New Zealand and Australia), give or take one or two.  It has been interesting so far seeing the various choices.  These blocks are going to be used in a chevron quilt.  The owner sent each of us 4 - 5 inch squares and requested we use 5 - 5 inch squares to make the bright 9 patch.  She also sent the dark fabric, which is a dark gray with small black dots on it.  She has already done several blocks herself and posted them on our blog, Bee Balm.   I just went over there and several people have already posted their blocks.  I will be posting over there soon, also.  This is another great idea for a quilt.  I have so many right now, I don't know what to work on next. 


I do know the first thing I need to do is get another rotary cutter. I am still using the first rotary cutter I ever purchased - it's my favorite - and the center screw is getting loose which is making the blade wobble a bit (not much so don't worry) it just sometimes doesn't cut the fabric and I have to go back over it again and again. It's not the blade. I thought that at first and have changed the blade a couple of times. I have also taken the metal locking thingy (that is a technical term) off and bending it a bit more - I felt that the problem might be that it had flattened out too much. That wasn't the problem either. Last night I took it all apart again (15th time) and really examined each part and the wobbly bit was the center post/screw. I might could put some E6000 in there and stabilize it (which I will probably do eventually), but I think I will splurge (with a 40% off coupon) on another rotary. This is not the only rotary I have. I have 3. This one, a small one and one that you have to hold in to get the blade to come out and work.  (I will google a picture) I really don't like this one, but it would work if I could find it.  I have moved it somewhere away from the usual place it rests.  Oh, well, shopping fun!  Except, I can't purchase any fabric.  I bought sooooo much this summer that I have limited myself to NO FABRIC in September.  (okay, I might purchase some at the retreat at the end of this month, but only if I really, really have to have it.  Last year, I didn't purchase any so I know I can control this addiction - a little) 


Well, Swell!

 
I previously posted that I would be working my way through the book, Simply Retro by Camille Roskelley.  I started with the first quilt, Swell.  I knew I wanted it to be really scrappy so I pulled down my box of 2 1/2" strips and began cutting them to the right size.  I then found some muslin laying around the quilt room and  I was off and running.  Cutting, sewing, putting the small blocks together to make larger blocks.  It was all coming together.  I had even posted pictures of a few blocks and some of you commented on the fabric I was questioning.  Everything seemed to be going great.  That is, until I had all the large blocks together and began moving them around on the design wall.  I couldn't figure out how they were supposed to go together to create those little plus sign/crosses. So,  I get the book back out and look at the quilt and . . . I put the large blocks together wrong!!!!!    Here are some pictures of other peoples Swell quilts that are put together correctly.  This how the quilt it is supposed to look. 

 
Picture borrowed from Daydreams of Quilts Finished by Anita
 
this picture is borrowed from Jana Machado's blog
 
 
These are from Chocolate Dipped Quilts and are made by a mother and daughter duo
 
I really love the pale colors in the quilt above.  See how the blocks come together to create those plus sign/crosses?  Love them.  Okay.  I need to make a decision - take the blocks apart and start almost over OR just put it together as is.   Hmmm.   I decided to put it together as is.  I really didn't want to rip out all that stitching (20 blocks) and then sew them back together.  Nope, not going to do it.   I  decided that would take too long and I could make another one later that is correct.  I am calling this quilt, Well, Swell. I did it wrong.  


After seeing all those other quilts on the blogs, I will definitely be making another quilt using this pattern and I plan on doing it right this time.   That pale pear fabric that I questioned earlier, but decided not to replace, really fades out in the picture and is not helped by the pale blue block that is right next to it.  It makes it look like there is an empty spot in the quilt.  Don't worry, I am not going to change it at this time.  That is the completed top in my classroom.  I bulldog clip the top to two yard sticks and then hang the yard sticks up on my board.  Works great!  I am so glad I discovered how to get a picture of my quilts without having other people having to hold them up.  Not that I won't have pics of that in the future. 


Monday, August 26, 2013

Chicken Salad

Someone recently asked if I posted recipes on the my blog.  I usually don't, which may seem crazy to a lot of people since my day job is teaching Culinary Arts.  However, I have to tell about my newest concoction I came up with tonight.  Well, it really is a combination of a couple nights cooking which resulted in tonight's dinner feast so let me back up.  A week ago, I tested 3 chicken recipes in preparation for a couple of classes I was going to teach the next day for teachers. The first class was on thirty minute meals or fast easy meals that they could quickly get on the table for their families without spending a ton of time in the kitchen.  I know that teachers spend the majority of their days at school and a lot of the time don't even think about dinner until they are driving home.  By that time it's just so easy - if you don't have a plan for dinner - to stop and pick something up at a drive through somewhere.  It may or may not be healthy, but it will be expensive.  The other one was on quick breakfasts to get you out of the house and that will stay with you longer (energy wise)  than those doughnuts we are all guilty of picking up on the way to school. 

Tonight I used the last of the chicken breasts to make a quick chicken salad.  (I LOVE a great chicken salad!)  I had a chicken breast that I cooked with some rosemary and plums.  It didn't look good and I won't be doing that again - the plums turned the chicken purple and didn't hold up well in the long cooking time - but the chicken did taste good.  That one goes back to the drawing board to be tweaked.   Anyway, the chicken was still good, if not pretty so I chunked it up (large chunks) and then I found a couple fruit cups in the cabinet leftover from another project (I think from February's retreat).  These were apples - which is why they were still in the cabinet - if they had been peaches, they would have been long gone, but the expiration date was still good, but just barely.  I drained them really well and threw them and the chunked chicken into a bowl.  I seasoned with a little salt and a lot of pepper.  I didn't season the chicken before I cooked it - just forgot since I was in a hurry to get them in the oven.   I pulled the mayonnaise from the fridge and realized that expiration date had already come and gone a long time ago, so I threw that away.  Mayo is not one of my favorite items so I don't use it much at all.   I only use it in making chicken salad and on BLT sandwiches.  That is it!   So, I had to go to my favorite, prime ingredient:  Blue Cheese Dressing!!  I love Naturally Fresh brand Blue Cheese Dressing and I especially love it on chicken.  Try dipping your chicken fingers in it!  I put a couple of spoonful's of the dressing in the bowl and mixed it up.  taste.  Hmm.  Needs something else.  My next favorite go to item is roasted garlic in a jar.  You know - the minced garlic in the jar you can find in the produce section of your grocery store?  If you haven't yet, try the roasted variety.  Lots and lots of flavor in that one.   Yummmm.  I put a little bit - just the tip of a regular tea spoon into the bowl to add some garlicky goodness and that was the ticket.  It was delicious.  I love experimenting with chicken salad and this one will be made again.  I may even add some celery - if I have it in the fridge - or even pecans -  the next time I make this.  Hey, I have some left over and I have pecans in the freezer - yep, they are going in there tomorrow.